
Getting your garage ready for a cabinet installation is actually the most important step if you want those cabinets to look good and last a long time. Prepping the space can save you from headaches down the road, and it makes the whole installation go a lot smoother. I’m here to walk you through everything you’ll want to do before the cabinets even make it out of the box.
Why Prepping Your Garage Matters
Proper preparation keeps your cabinets lined up well, prevents future problems, and makes it easier to use your new storage setup once everything is installed. With garages being home to everything from muddy boots to yard tools, prepping this space is a bit different from working inside the house. Dealing with dust, uneven floors, and wall issues is just the start. Getting this right means your cabinets go up quickly and stay in good shape.
If your garage is like mine used to be, it might double as a tool shed, sports locker, garden center, and the place where odds and ends gather. A good prep routine keeps all that chaos from getting in the way of your new cabinets. Plus, thinking through your layout could help you make the most out of your available space, especially if you use your garage for hobbies or storage year-round.

Happiness is finding the right tool, right when you need it!
Step One: Clear Out the Space
The very first thing I do is move everything out of the area where the cabinets will go. This usually means shuffling coolers, bins, and stray garden rakes out of the way. Don’t just push stuff to the edge—get it several feet away from your workspace. This opens the area so you can see what you’re working with and creates enough elbow room for installation tools and parts. If you have heavy items, get a hand truck or call a friend for backup to avoid injury.
This is a good time to sort out what you actually want to keep. A quick declutter makes a big difference when it’s time to load your new cabinets later. Donate, trash, or relocate anything you don’t need; you’ll thank yourself during installation. Some folks lay out a tarp nearby to keep things temporarily organized and clean.

Check Walls and Floors
Walls: Inspect and Repair
Garage walls sometimes take a beating. Dings, holes, peeling paint, or even mold can mess with how securely your cabinets attach. Run your hand over the surface and look carefully for rough spots or damage. Patch small holes with spackle, sand them smooth, and spot paint if you want a cleaner look behind the cabinets. If there’s mold or serious water damage, deal with those issues before moving on since moisture and new cabinets definitely don’t mix well.
Floors: Make Sure They’re Flat
Garages often have sloped or uneven floors for drainage, which can throw off cabinet alignment and door swings. Use a 4-foot level or straightedge to check the spot where you want to install base cabinets. If it’s way off, you might need shims during installation, or for major slopes, it could be worth checking out floor leveling compound. Even if you plan only upper cabinets, a flat floor keeps your workspace organized during the job. Double-checking the slope beforehand saves headaches once the install gets started.
Clean Everything Thoroughly

Any dust or debris left hanging around will end up inside your brand new cabinets, so grab a broom, mop, and vacuum to give the area a proper cleaning. Wipe down walls, sweep or vacuum the floor, and clear out cobwebs. Any old grease spots, especially near the garage door, should be scrubbed up so they don’t make things slippery during the install.
If your garage hasn’t gotten much love lately, consider a shop vac for dust and corners, and run a damp rag across the base of the walls. The cleaner the surface, the better your cabinets will look and hold up. In addition, cleaning early lets you spot trouble areas like leaks or cracks you might have missed.
Map Out Your Cabinet Layout
Before drilling any holes, it helps to plan where each cabinet and shelf will go. Grab a tape measure and mark the layout directly on the wall using painter’s tape or a pencil. Double-check measurements against your cabinet specs to make sure doors and drawers open without bumping into anything, especially garage doors, outlets, and light switches.
I always use a stud finder at this point to mark out where the wall studs are. Most garage cabinets need to be anchored into the studs for real support; drywall anchors just won’t hold up against heavy tools or storage bins. Mark those spots before bringing cabinets into the space. Sketching your plan on paper or using an online design tool can help you picture the final result, making sure every cabinet, shelf, and hook serves a purpose.
Handle Wiring and Outlets

If you’re planning on running power for a garage fridge, charging station, or even integrated cabinet lighting, get this done before you mount anything. I’ve had a situation where I had to uninstall a cabinet just to access an outlet, which is definitely not fun. Relocate or add outlets as needed now, or bring in an electrician if you’re not comfortable doing this work yourself. Even if you don’t need to move outlets, make sure your layout doesn’t block anything you use regularly. Running conduit or surface-mounted outlets can give a boost to your garage’s flexibility for future projects.
Prep for Installation Tools and Access
Next, gather all the tools you’ll need for cabinet installation and set up a staging area. I usually make a spot nearby for the drill, screws, shims, levels, and safety glasses, plus a stepladder if you’ll be working up high. Having everything close at hand means you’re not hunting for bits and tools midway through the job. It’s also worth double-checking you have all the cabinet hardware, brackets, or extra fasteners the instructions call for. Some people like to set up a small table to sort and lay out hardware; this can make the assembly process easier to follow and less chaotic.
If you’re using a helper (which I always suggest for wall cabinets), let them know when you’ll need an extra set of hands. Communicating here can really speed things up and keep your cabinets straight.
Climate and Moisture Considerations
Garages get hot, cold, and sometimes a little damp, especially if you live somewhere with wild weather swings. This can affect the materials in your cabinets, particularly wood. If you’re working in the summer, wait for a cooler day or at least open a window and let the air circulate. For wet garages, run a dehumidifier for a day or two before installing anything. Proper airflow and stable temperature during install make sure the cabinets settle evenly. You might want to check for drafts near the garage door too; sealing gaps keeps out dust and moisture. This small step adds years to the life of your new cabinets, making sure humidity doesn’t cause warping or swelling down the line.
Common Problems and Simple Fixes
- Uneven Walls or Stud Spacing: Garages aren’t always square, and studs can be spaced awkwardly. Use wood blocking or specialty brackets to help if the standard mounting spots don’t line up just right.
- Exposed Pipes or Obstacles: Sometimes, water lines or other things pop up right where you want a cabinet. Measure these out before installation and tweak your cabinet sizes or layout to work around them.
- Floor Drains: If your garage has a drain, make sure your cabinets don’t block access or get in the way of water flow during heavy rain. Sometimes raising cabinets slightly with feet or using wallmounted models solves this easily.
Real-World Example: A Smoother Install With Good Prep
During my last cabinet install, I hit a snag when an old anchor was left behind a section of drywall, right where the new cabinet’s screws needed to go. I had to cut out and patch that section, which slowed everything down. If I’d done a more thorough wall check in advance, that could’ve been cleaned out before cabinets were ever brought in. Taking time up front really does pay off, and it means fewer surprises mid-project.
Frequently Asked Questions

Do I need to empty my whole garage?
Usually, you only have to clear the immediate area where the cabinets are going, plus a few feet on each side. Sometimes it’s helpful to use this as a chance to declutter more, but the whole garage doesn’t have to be empty.
Can I install cabinets if my garage isn’t insulated?
Yes, you can. Just be aware that uninsulated garages have bigger temperature swings, which can affect some cabinet materials. Choose moistureresistant finishes and hardware for the best results.
What’s the best way to anchor cabinets in concrete?
Garage walls are often concrete block or poured concrete. Use special masonry anchors and a hammer drill instead of standard wood screws. This keeps cabinets safe and stable.
How should I handle existing shelving or old cabinets?
Remove old hardware and shelving boards completely before the new install. Patch any holes and fill cracks to create a strong, flat mounting surface for your new cabinets.
Ready for Cabinet Installation
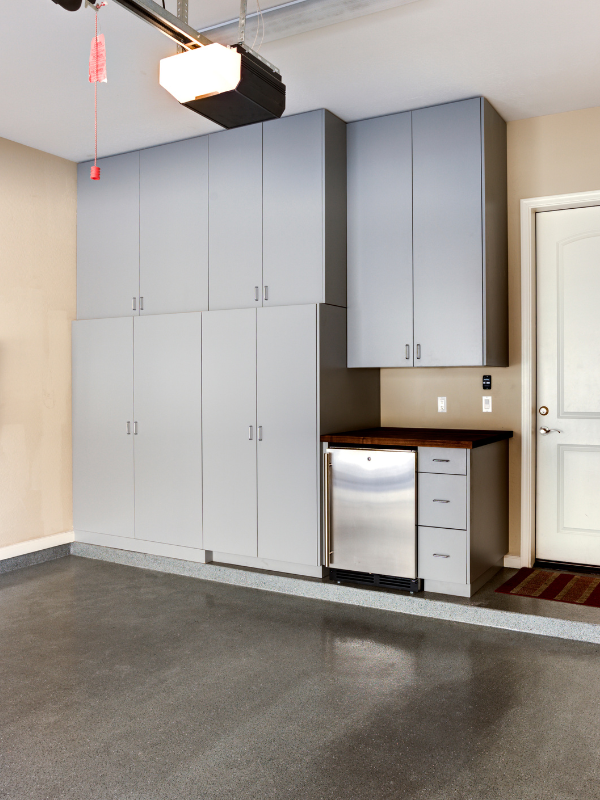
With your garage clear, cleaned, checked, and mapped out, you’re basically set to start. Prepping well makes the install quicker and leads to a much neater, long-lasting result. When you take care of the little things up front, your new garage cabinets will work better and look sharp for years to come. Plus, you’ll end up with a space that’s easier to clean and more functional for everything you need it to do—no more stumbling over old bins or searching for lost tools when your sleek new cabinets are in place.
Happiness is finding the right tool, right when you need it!